My public PGP key

Here’s my PGP key. You can verify it’s me here:

http://pgp.mit.edu/pks/lookup?search=chris@whyley.com&op=index


-----BEGIN PGP PUBLIC KEY BLOCK-----
Version: GnuPG/MacGPG2 v2.0.22 (Darwin)
Comment: GPGTools - https://gpgtools.org

mQINBFRrHd8BEACqbUCGNJXwAdaR5H/E+26sNM2qae+zlS5mHd0Rftv9boPxKNqt
yZL/hjvSNu1rVIPaOA/Jtu90W822Ri+eE5h1sULMOnoZ9GVzY5QVk+pBKMWeFLtL
h3z9/0J49SG1hVnN4B47OpVtLDPJCKyPGd+NZD1aTn0fiJ4ZLKA4/hW6IjE6CZ+p
FBuJXXswqtDHn18yioqYKQx/7UgGc8QS3/KDW36NoGJ40gNOG5NcEjz1QfeBLhpA
t+/DzM5r9iUjC0BfXjhszJsJhuGrz6hvpBJ7TDNFnFzBCby7ue7T0GvwjdkEMQQu
a133e0MIAfH9Ptpfi1OcnLU+0FvxQr9lxHBjgcYdUblV/JwZfHIcoz9enxi8Nc/L
jA4R66QwJvXo3O08c8kiR0qVUBlnOtJwQgOspOWsvuocbqhP7RoEl/LSq3fZfbYf
HX2qgMdd7azVg+rmnswb9LX6J4Bsumi8uSrkJhLNbcoVdnOCewhHhcCqb6brj6bZ
Argd57e6uhsjK2GcB7i+uc7WJMpuYDwYeAhtpQoz8TNB8otSiPpYjUuikX3kaaf9
52bmmRr0iAPyb7ztaUnbZuxXVfTQEIJux2AnCzbMGMSUBWmwRzPMT3wfgopqTIH0
nWV4PyzSI4rgM2Q1HvpT4Z1wD8iEv4RdRUczZmlvn6B3+laDzBZ4G4/xaQARAQAB
tCVDaHJpc3RvcGhlciBXaHlsZXkgPGNocmlzQHdoeWxleS5jb20+iQI9BBMBCgAn
BQJUax3fAhsDBQkHhh+ABQsJCAcDBRUKCQgLBRYCAwEAAh4BAheAAAoJEKBh2dsn
+k7T26EP/jzTFdEmXPLwMdWfQG/AjrweN163Vk62NRksSF5V3lNXOwU5qFoRbYQ+
Vln6m07wYpK150GQ6X6oXdxXfG8z7MtIjOzO4/Zwph4GRdGgIHOKKWfp2fBS58id
gWa/mO8WzOplXdPo2VdmbLbDZT59Rx2XjRi6xLbybECVi/8O8XImuOytZf276FWV
oQr9KycrDFIgtIgIA1Ghz1DrbnxG3zJia+ZQqVSMO9qNvYlpPknu3j8nYfNoJsuG
4C6dvPzSQwWDIeN5WGAHnxnbOuEM4lWPgod1fb4HsMF922FKU059z827DBfBz/qC
eIDc05kg5J7vWk9QZuQ278e82I6FFgWyLlPWytxoIBz4GHp6znTZWjeT03Xfc+cY
HvRjzAYKepFhKn9AiH4jrmDAHem5gsK7z3BoRzxpXjfDsR4dLs8hW+AL1i5hu3A+
J8h5NaWQBqw+parBkPNt9HEPRIDod9nRquD0YDN8O0Yr4vu54hafUhbVqOmm/ll0
CFGeN6fnykoAa70odJDW/Jtx9zuRS92bRWw5q3+NIm+g1n4N9Wx0EsXrVKq/6DxR
gvfqHApb8SVJTBR0qWDcnEvsNZn6IJsCJXv2IePEbAWqfu+R6hRf8U88/pXTLkfK
4T6fYoMiou+8u+iSzw8Z/+SebgFt87p9bcFtTMATlILeezuVb0hAuQINBFRrHd8B
EAC/xoy1wf6nml66dJ5zu7Kr6N8mmKV1Zglrlq4NRZwmmB3gjEbBEdHOjRmchNWd
WD3/vcisO24KyoAbM5F6NRNznhpC9si5S6G3MMhpQxMJa9hYkrHRv+baDVuiPnv9
J/FU4ql3mCquYi0WLUvQOwykJB7Xsqqtsm3H8cEC+CoEoT/LQBXMGrCJGqHRYT5z
JFjLuqT5UyhquOQya7NrCyjTi6db44JhRmIRWGdu3C/O/2oFojPGI4N7vSGKMpH2
7e97RR7Moz+Cmxjmd5zSvVj3QeW8uDtFy8fJ59CGmsX1zkFW7gzuGq5XRh0jgse9
xwl6Mbceu6hfnYfZpCOVxVv/FUIviJhM64HoOPNZjeD4dpxD492c74pSrzipsCXt
EV4Ob1lVoQ10AszC1E0ghfe/s+XXsikWUhjT8wPu3PX1ZO5h+KZqoGqmPeK4jae0
Ad7nZ81N7zxnoq0z8lz6I+5pfHv6LDevaKsbo9NSaw2Ieoqrdw5fZfp2neZJCMCA
wUqZ7KDBPSy/gNeoDKWt8qvjUTGOt9PwS5BbWHiiekzOdH9e1uGhmCpr4Bdfhu9d
lgnUeaUkkZwQpSJ7Drp+t4wP76xPaLUmz8YxxbqxhO4TAkicGTL7fJQQjpHJPI2I
OAOOBc8IHHGwbqpiHw4nDHXKdwa0pD9b68xutbmNAJ3fDwARAQABiQIlBBgBCgAP
BQJUax3fAhsMBQkHhh+AAAoJEKBh2dsn+k7TN8sP+gLvokKQL5ElICT4WiNHZVkP
JYXlY8xXu66S4K5bwoouZ3Poxw1pdouhYV/daWABYcLQFxnKZpwWboEKak9Soxzc
wfVuBL13GkuNiJWoMry7M4lcAi6sYFD1WCAG6xRgqWrBsb7o+rhSJPcmvJ68ipRh
t7oIEfXF0IxEnbCH2JQgLg13XgDym/GO6G2Yedwuvy4YMWOKp+OO6y9pZfhdrxp0
GLE/srOOysTyeQ4Lk47iIy51jzBSdO3crN+LhscMpKsM+IZ6HRRD8V7Y0pZsLUHc
xPM3y5YRrBf/r/cRDGUt9tmRO3cKVXMnIITbpqPS2AsNtoRuOPxDZ7g680G5IuNa
08y6ktopWGQWqbgFH5HD+vlQMYEj62oQBZFDu9tP6t8gzyrBUanNxAo53NBEHfaA
hcbFjUHS1819lQ7npnew9rCeNji83HpNzROXQWeXeU6yBG6WCQ7JfBY1OKbsemPQ
c0JgsRN2RlqmCL+LYeqdmeSJwFya6fzAlggWkJYQsEPl2SuUKTYLbIV+8eB++0RH
0YtQVMOsq9BbcT/eJZQegrutesk3C0f+gYOvxxpJ6kS7kBOnyaUP0kXtKoYrBU4D
npMynqzHf5Gyr8vcm0vCNyX8azyYX/El925i7/M9veIA7A2EEo3+9ixuxEG+fsWC
KSKR50FN6p9pp85+ZAPh
=OkEB
—–END PGP PUBLIC KEY BLOCK—–

Advertisement

How to install a new SSD in a Macbook Pro (13 inch 2010)

This is a step-by-step guide for installing a new internal SSD drive on a 13 inch, mid-2010 Macbook Pro. It’s a slightly modified version of the OWC guide.

  • Check your Mac is compatible – it should be a “Mid-2009”, “Mid-2010”, “Early 2011,” “Late 2011” or “Mid-2012” MacBook Pro model. You can check it using Apple’s instructions here.
  • Buy the right stuff to do the job – you’ll need:1. An anti-static wristband to prevent damage to your laptops internals from stray anti-static sparks from your body. I went for this one from Maplin’s
    3. A #00 Phillips screwdriver and a T6 Torx screwdriver – I got my Phillips one here and the Torx one here (both from Amazon).
    3. Some way to connect up your SSD drive before you install it (so that you can format it and clone your data onto it) – You could use a drive enclosure, but I got this nifty Bipra tool to do the job (it can handle lots of different drive types).
    4. An appropriate SSD drive (2.5 inch internal) – I went for the Crucial 512GB M4 SATA 6Gb/s 2.5 SSD.

    • Once you have your new drive hook it up to your Macbook and clone the data from your drive onto it using this OWC guide. I used the Carbon Copy Cloner – it cloned 121GB in around 2 hours.
    • Test that your cloned drive can boot ok – Once you are happy follow the instructions on the OWC video to pop your new SSD into your Macbook. Don’t forget to put your anti-static wristband on first and attach it to an earthed source (I used a radiator downpipe) before tinkering

The inside should look something like this (the SSD drive is in the bottom left-hand corner)

Happy hacking !

Migrating Amazon EC2 AMIs to other regions

It’s been over a year since my last blog post. Time has flown since then, and a lot has happened – I’ll cover the highlights in another post.

In the meantime I wanted to jot down some notes about Amazon Web Services, particularly around launching instances in other regions (mainly for my own benefit !) Amazon currently operates 3 “regions” each of which can be thought of as an individual “cloud” in it’s own right. The most recent came online in December in California.

I wanted to run one of our EC2 instances in this new region, but it wasn’t quite as straightforward as I’d hoped. A few people have mentioned problems about doing this but one post on the AWS dev site was very helpful.

Basically you have to migrate your AMI from one region to another before you can run it. To do this first launch an instance of the AMI you want to migrate in US-East, then on that instance run the following command (detailed help here):

ec2-migrate-bundle -k (your private key file) -c (your cert) -a (your access key) -s (your secret access key) --bucket (your source bucket) --manifest (your manifest filename) --location US --region us-west-1 --destination-bucket (destination bucket you want to create)

… then, on a local machine run:

ec2-register --region us-west-1 --name (your ami name) (your new manifest fullpath on us-west-1)

Note: You can of course use the AWS Console to register your AMI too.

Configuring a WAMP stack for production

Edit: Steve Reynolds posted a great followup focusing on how to do this in EC2.

stackSo my brother recently asked me how to best go about configuring a WAMP (Windows, Apache, MySQL, PHP) stack for production. I’m sure there’s a ton of things you should do, but here were some intial thoughts that sprang to mind. I may update the post with others as I think of them.

All of this applies to a single server environment, once you start scaling out different rules apply. Ideally your architecture should be designed so that you can scale horizontally though, so that if things do take off you don’t find yourself re-writing everything.

Feel free to add other tips in the comments …

Windows

  • Turn off uneccessary “stuff”
    Windows runs a bunch of services by default that you don’t need. Bin them. Especially the following:
    – Windows Firewall (will mess with your inbound/outbound traffic)
    – Indexing service (will thrash your hard drive trying to be “helpful”)
    – Any anti-virus services (use your discretion here, but generally they can cause a lot of unecessary disk activity.)
  • Sort the startup folder and app tray
    Blitz everything from the startup folder and app tray that isn’t absolutely necessary.

Apache

  • Grab the right copy
    Always get the most recent copy for bug fixes and features. At the time of writing v2.2 has some nice load-balancing configuration features for instance. Also, make sure you download the SSL-enabled version of http server, it may come in handy.
  • Set cache settings
    Take a look at the ExpiresActive and ExpiresByType config options to setup caching for your images and files that won’t change that much (css, js). This will make your site more performant in the eyes of the user and save you money on bandwith charges.
  • Sort out your logging
    In test mode you probably want LogLevel set to “debug”, in production you’ll want this at something like “warn” to avoid unecessary logfile activity. Also make sure you use CustomLog to grab all the info you can about your end users and rotatelogs to manage your logfiles.
  • Disable directory browsing
    An absolute must, see this howto.
  • Setup custom error pages
    Use the ErrorDocument directive to setup nicer looking error pages. They look better, and don’t give outyour sensitive environment info.
  • Enable compression
    It’s well worth doing and straightforward.

MySQL

  • Write to a seperate disk
    Do data writes on a different disk to the webserver and application processing. You want to ensure that you don’t have disk contention issues.
  • Consider RAID
    If uptime is crucial consider implementing something like RAID 1 to mirror your data across multiple disks.
  • Backup the DB data
    Do this at least every 12 hours, using something like S3.
  • Tweak configuration options
    There are hundreds of config options for MySQL, probably worthy of a seperate post in their own right, but by far the most important is your upfront decision about which table-type to use, as it’s difficult to change afterwards. Check out this lowdown on some of the different options.

PHP

  • Enable extensions
    PHP works quite nicely out of the box, but remember to enable any extra extensions (the bits with “extension=” in your PHP.ini file)
  • Tweak post rules
    You might want to set the “post_max_size” variable if you’re accepting large (or want to limit) file uploads.

Miscellaneous musings

  • Consider S3 for storage
    Storage is hard. Doing it yourself is hard. If you’re doing it a lot let Amazon worry about it for you, by building on top of S3. In your application design it’s easier to bake this in upfront rather than retrofit it. And it’s cheap.

Bartlet for America

FIVE days from now the U.S. people will vote for their next President, the leader of The Free World. Forty five percent of his own countrymen will vote against him. He will carry the electoral college with 5 to 6 swing states. Media outlets will both laud and pound him. Bloggers will rejoice. Others will hate the sight of him. Some will plot to take him down. Many more across the world will see him as little more than a figurehead for a cabal of selfish modern day robber-barons, intent on peddling the new religion of consumerism, and all the foreign misadventures it entails.

We have a dim view of politics in the UK. Heck, we’ve had long enough to get cynical about it – we’ve had parliamentary representation for over 300 years, and enough dubious political figures to found a small colony (and many did). We rail about low pay, the state of the railways, the youth and Prescott’s Jag. We moan about a government out to tax us to death (and beyond), and the appalling state of our health service. We don’t choose to vote, but we like to have our say, even so.

We forget that most politicians don’t earn as much as the average Managing Director. They don’t get into politics for a cushy life, an easy ride. They do so to serve. To make a difference, to affect change in a hurting world, to step into the arena, not cower in the corner. We should treat them as heroes, not villains, applaud their commitment, their sacrifice, their service.

I for one still believe in a place called Hope. As Leo himself once said:

    “This is the most important thing I’ll ever do. I have to do it well.”

That’s what service is all about. Just ask Josiah Bartlet.

FOWA Day 2

Back at FOWA for day 2. Things feel a little bit more sombre this morning, maybe because the stock markets are tanking, and Tim Bray from Sun gave a pessimistic keynote about the future (more on that in a later post).

In the meantime here’s a gratuitous picture of a very fast server. I think this would look good in the living room at home:

Band practice

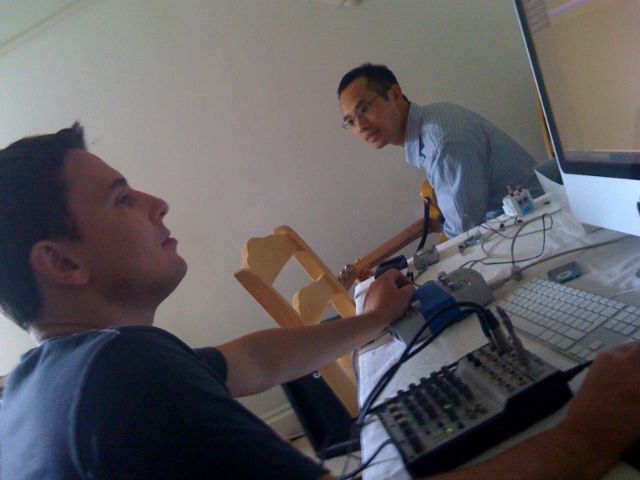
Matt, Chalkers and I hooked up to play some tunes a couple of weekends ago. We were at least as good as the “on the road” years in Zippy’s …


We may have, er, tweaked the sound a little:

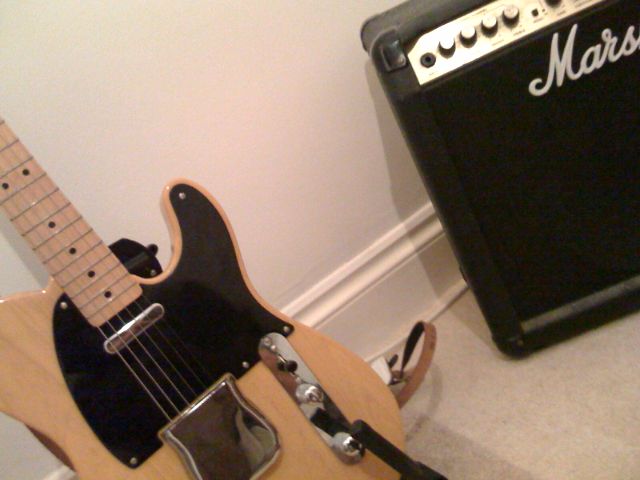
… but at least we had some better gear than uni days:

IPhone

So I picked up a new phone today. After 10 years with Orange I switched to O2 for one reason alone – Apple’s new IPhone.

photo

So far I’ve been mightily impressed.